Give your customers great support using Google Groups for Business Collaborative Inbox
This article explains how you can quickly set up a help desk using Google Workspace's Google Groups for Business Collaborative Inbox,
What is Google Groups for Business Collaborative Inbox?
Google Groups is best known as an Internet message board, however what isn't so widely
known is that Google
Groups
is also capable of being a shared support inbox, allowing you and your colleagues to
manage customer questions
and issues as a team.
Your customers (or leads, or suppliers, etc) can email your support email address and
you can view, manage and
respond to their questions. Think of your Collaborative
Inbox as a kind of turbo-changed version of the regular Gmail inbox: customer emails are
grouped by
subject and you and your team can reply to queries, assign support issues to other team
members, categorize
and manage emails. There are also a number of other help-desk type features such as
marking queries as
complete, filtering isses and so on.
1. Create your Collaborative Inbox
To begin, head on over to Google Groups, and sign
in with
your Google Workspace login (you will need to be a company admin or have delegated permissions to
create a group).
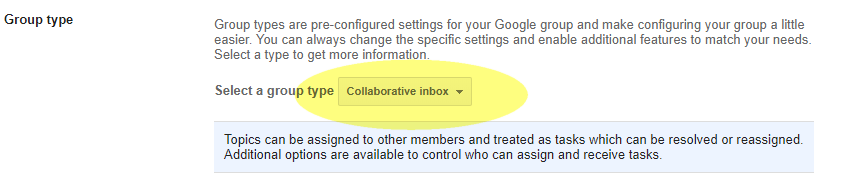
Click to create a new group, give your group a name and an email address and select the
group type as
'Collaborative Inbox'.
You want your customers (who of course are not part of your Google Workspace organization)
to be able to post help questions to your group, so select the permissions option to
allow "anyone on the web"
to post

Go ahead and create the group.
2. Set post permissions
You also want your customers to be able to email in their queries and issues, so
click the link to "manage"
your group and
navigate to "Information" > "General Information" and check to "Allow posting by
email"

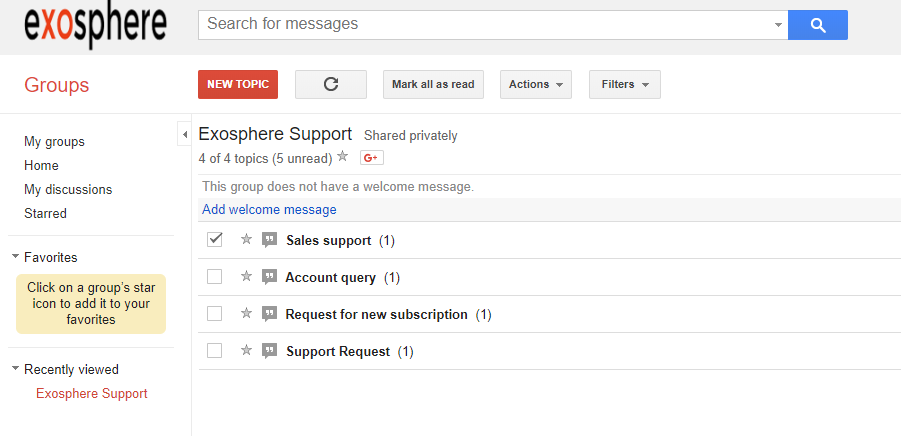
Your group is now created, test it is working as you expect by sending an email to
your group address from an
email outside of
your organization. The email should show as a topic in your group shared inbox.
3. Set up email authentication
If you haven't done this already, now is a good time to set up email authentication
for your domain. This is
important
as without email authentication set up your replies risk going to your customers'
spam folder. Email
authentication
or Domain Keys Identified Mail (DKIM) is a process whereby you prove that you own
the domain name you are
sending
email from.
To set up email authentication log in to your Google Workspace admin console and navigate to
"Applications" > "Google Workspace"
> "Gmail" and click on "Authenticate email". If you haven't already set up email
authentication you will see a
screen like the below
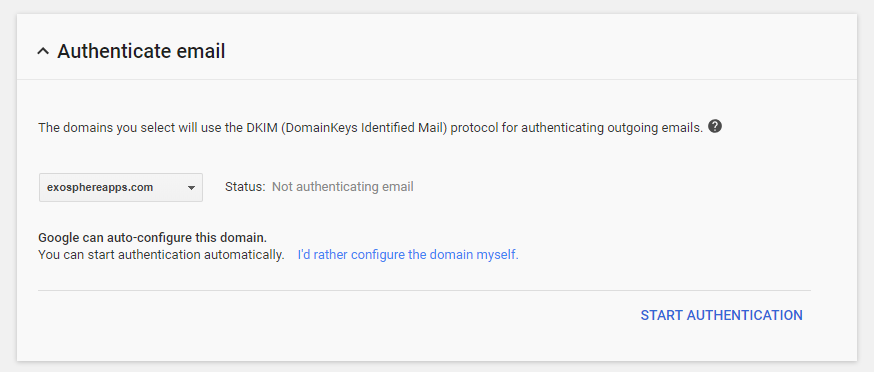
If you purchased your domain as part of your Google Workspace set up then simply click on
'Start Authentication' and G
Suite
will automatically do the rest. If not, you will need to insert some information
into a TXT record of your
domain's DNS settings.
This process can be a little technical, however Google Workspace does provide on screen
instructions to help you.
Google provides an online tool that you can use to validate your Google Workspace outbound
mail setup at
https://toolbox.googleapps.com/apps/checkmx/
4. Setup an auto-reply message
An automatic, or canned response lets the person contacting your support desk know
that you have received
their enquiry.
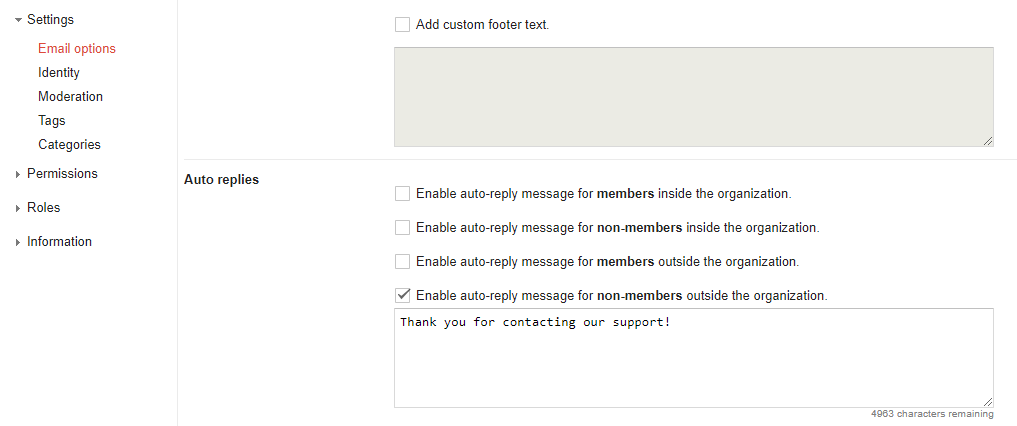
To set up a canned response in Google Groups, navigate to "Settings" > "Email
options". To enable the
auto-email for people
emailing your support address, check the option "Enable auto-reply message for non
members outside the
organization",
and enter the text you would like your customers to receive.
4. Tip: Reply to messages from the shared inbox
When a new message arrives you and all members of your group
will receive a copy of the email in their Gmail inbox (you can control who receives
notification and with what
frequency).
This is a handy feature as it allows you and your team to be alerted promptly
of customer emails without having to continually monitor the shared inbox.
You can reply to these emails directly,
however if you do this without CC'ing in your group email then your email response
will not be saved in the
email thread in Google Groups.
For this reason it is best to reply to queries by going first to the shared inbox.
If this is not possible,
for example if you are replying using Gmail on your mobile device, then remember to
CC in your group support
email address so there is a record of the correspondence.
5. Tip: Post resplies on behalf of the group
When you or a group team member responds to a customer email from the shared inbox
you have an option to
send the response
from your own email, or from the group email. It is best to select to post on behalf
of the group because this
way replies will come to the shared inbox (where they are tracked) rather than to
your personal inbox (where
they won't
be tracked).

More information
For more information on Google Groups for Business see the Google help topic